Deal Of The Week: 50% Off All Stitching Cut File Bundles


Tuesday, April 23, 2024

Use coupon code SCRAPPY to receive 50% off all 3 of my Stitching Cut File Bundles from now until April 29th! This includes the
20 Stitching Cut Files, 36 Stitching Cut Files, and 25 Christmas Stitching Cut Files!
TO USE THE CODE: Add the 20 Stitching Cut Files36 Stitching Cut Files, and/or 25 Christmas Stitching Cut Files to your bag, go to checkout, and find where it says "Have a promo coupon or gift card?" Click/tap "Redeem your code" and enter SCRAPPY to apply the 50% off discount. Code cannot be applied to past purchases and ends on 4.29.24.
PRODUCT DETAILS: Do you enjoy hand stitching on your projects which adds beautiful pops of color and texture? Stitching pattern cut files make it "sew" easy to do just that! With 81 designs in all three bundles combined you'll have stitching projects to keep you busy and happy for years to come! I use all 6 strands of thread when I'm stitching and this is the needle I use.
PLEASE NOTE: You are purchasing DIGITAL cut file designs, no physical items will be sent to you in the mail. Once purchased, Ecwid will send you an email to download the zip folders which when unzipped contain the .svg, .studio3, and.png files so you can use the cut files with any electronic cutting machine (Silhouette Cameo, Cricut, Brother ScanNCut, etc.). For a Silhouette Cameo, open the .studio3 file and it is ready to be cut. Upload the .svg file into Cricut Design Space - be sure to weld all of the layers of dots together first! The machine will make small dots as a pattern and may need to be poked all the way through before stitching. For personal use only.
Let me know if you have any questions by email at paigetaylorevans@gmail.com, thank you so much, and happy scrapping!

Blooms Layout by Jackie Ashton


Hi everyone! Jackie Ashton here with my DT project using Paige's Folk Flowers from the 19 Spring Cut Files paired with the colorful Blooming Wild collection.
I started by cutting the Folk Flowers from white cardstock and added it to a background made from the green floral Paper 5. I wanted the cut file to be peeking behind my photographs and act as an additional layer to my background. I backed each photograph with patterned papers from the 6x8 Paper Pad, leaving a small border around the edge. After adding my photographs across the page, I added a few tags from Paper 9 behind, linking the two sets of tags with some thread. Underneath the left hand side photograph, I added two labels from Paper 13 to write my journaling. For the title I used the lovely Thickers. I finished my layout with bits from the Sticker Book and flowers from the Puffy Phrase Stickers.
I love how this turned layout out and I hope you can get some inspiration to use Blooming Wild and the Folk Flowers from the 19 Spring Cut Files! Thanks so much for stopping by and have a great day!
SUPPLIES: Patterned papers, stickers, die cuts, embellishments: BLOOMING WILD; white cardstock; Cut file: Folk Flowers from the 19 Spring Cut Files by Paige Evans

Xmas Stocking Layout by Paige Evans


Monday, April 22, 2024

Here is the finished layout that we made in today's Make With Me Monday featuring torn patterned paper strips! I used my Sugarplum Wishes collection and created a page for Fox opening up his stocking this past Christmas morning. The horizontal torn paper strips balance out the vertically cascading photos & embellishments! Lots of bright patterned papers bring the page to life and a punched border strip frame keep your eyes within the page as well as hide some edges as you can see in the video :) 
Here is the video for re-watching and you can find the Make With Me Monday playlist HERE.
Be sure to give it a LIKE and subscribe!
PHOTOS: (2) 3x4"

SUPPLIES (affiliate linked):
Sugarplum Wishes collection: https://shrsl.com/42mgh

SCRAPBOOKING BASICS:
12" paper trimmer: https://shrsl.com/334mc
foam adhesive: https://shrsl.com/3c26t
fussy cutting scissors: https://shrsl.com/43jzk
journaling pens: https://shrsl.com/4i2ix
white cardstock: https://shrsl.com/4a1op

OPTIONAL SUPPLIES:
white acrylic paint: https://shrsl.com/4i2hq
border punches: https://shrsl.com/4i108

The layout is based on this sketch:
And the sketch is based on this layout which I made a few years ago with my Go the Scenic Route collection!
Sketches are a great starting point and then you can change the collection, shapes, number of photos, and more, for completely new and unique results! Thank you so much for joining me live today or in the replay!
See you again on April 22nd for the next Make With Me Monday!

Blooming Wild Envelope Mini Album by Amber Mitchell


Hi crafty friends! Amber Mitchell here on Paige's blog today to share with you a mini album that I created using the Blooming Wild collection and a handful of Paige's envelope cut files: 123, and 4.
When it came to creating this project, I decided to combine two of my favorite things: binder rings and envelopes. I'm a huge fan of binder ring albums because they're incredibly easy to make and so much fun to flip through! And I always love including envelopes in my projects as fun, interactive elements that also add extra storage. For this project, I used four envelopes, white binder rings, and some handmade chipboard covers.

I cut out the envelopes and then folded and creased them along the predetermined lines. I did not fold the top of my envelopes down for this project - I left them open so that larger photos or journaling cards could be tucked into them. I used liquid glue to adhere the bottom of the envelopes to their adjacent tabs. I then punched three holes along the bottom of each envelope and set them aside to make the covers.
The covers of this album were made using medium weight chipboard. I cut them to have a width that was slightly larger than that of my envelopes (4 inches). My front cover measured 2.5 x 4 1/8 inch and my back cover measured 4 1/8 x 5 inches. I wrapped these using a sheet of patterned paper from the Project Pad. I then lined them using scraps I had from Paper 18. Next, I added holes to the bottoms of each cover, using the holes on my envelopes as a guide.

I created a few photo mats for this project in various sizes and added them to the backs of the first three envelopes. I also added journaling cards to each envelope. One thing I love about this type of project is that SO many photos can be tucked inside each envelope. Photos can also be added straight to the binder rings themselves to add space and texture between the envelopes.

The final step, and always my favorite step, was to embellish. I started by adding green eyelets to the holes on both of my covers, just to give the project a more finished look. On the front cover I added silver foil corners and a rainbow from the Chipboard Stickers. I layered up Cardstock Stickers and a flower from the Floral Die Cuts around these. Throughout the album I used a lot more of these flowers. On the second envelope, I created a cluster with them by layering smaller ones on top of a large die cut. To this envelope, I also paperclipped on a few handmade paper tassels I created.

Paper 16 features a lot of beautiful butterflies in various colors. I fussy cut a lot of these and added them on nearly every page to drive home the theme of Spring. I love how happy these make the album feel! For some final touches, I added clips from my stash, a bunch of sentiments, and a few tiny flowers from the Mini Flower Puffy Stickers.
I love how this album turned out! I love how the envelopes vary in size and allow for sneak peeks of the other pages, and I just LOVE how bright & happy it looks as a whole! Thanks so much for stopping by my post today!

SUPPLIES: Patterned paper, die cuts, stickers, embellishments; BLOOMING WILD; Cut files: Envelopes 123, and 4 by Paige Evans
Location: California, USA / Blog: Happy Crafty Studio / Instagram: @bambidearr / YouTube: bambidearr / Pinterest: bambidearr

True Love Layout by Paige Evans


Sunday, April 21, 2024

Here is a layout I made for the Spring/Summer 2024 issue of Scrapbook & Cards Today Magazine which you can download and browse for free HERE! I used my Blooming Wild collection and featured the floral LOVE Paper 17!
I have a process video so you can see how to make this quick & easy (but pretty & cute!) layout from start-to-finish:
This layout is as simple as fussy cutting the floral LOVE letters from Paper 17 and placing them on a light pink cardstock background with foam squares for dimension, adding a special black & white photo, then embellishing with a few coordinating pieces like flowers from the Cardstock Stickers, a Journaling Spot, and finishing up the large title with Puffy Phrase Stickers and a Chipboard Sticker
I hope this layout inspires you to check out the Spring/Summer 2024 issue of Scrapbook & Cards Today Magazine which you can download and browse for free HERE and try creating a similar page with my  my Blooming Wild collection! Let me know if you have any questions and thanks for stopping by!
SUPPLIES: Patterned papers, die cuts, stickers, embellishments: BLOOMING WILD

Casa Bonita Layout by Paige Evans


Saturday, April 20, 2024

Here is the second of four layouts we make in class with the Life of the Party collection by American Crafts!
Purchase the virtual class to join in the fun HERE!
This page features patterned paper hearts in all different sizes and colors, placed in three rows, and then machine stitched in place! Machine stitching is optional, I just love the texture that it adds. We learn how to make this page from start-to-finish along with 3 more 12x12 layouts. I walk you through my tips, tricks, and techniques and offer suggestions for changing things up and altering the page to put your own spin on it!
After purchasing the Life of the Party Virtual Layouts Class, Ecwid will email you the PDF that contains a list of supplies, photo sizes, templates, cut files, instructions, and a link to YouTube where the class takes place. The class is pre-recorded so you can go at your own pace, watch it as many times as you need, and access it at any time!
Let me know if you have any questions and I hope to see you in my Life of the Party Virtual Layouts Class!

Flower Frame Layout by Inessa Persekian


Hi friends, Inessa Persekian (paperandbling on social media!) back on the blog today and I'm excited to show you a spring take on Paige's watercolor flower heart layout! I used her Flower Frame and Layered Flower cut files paired with the Blooming Wild collection.
Instead of backing the Flower Frame cut file I wanted to add some Layered Flowers on top. I cut it from white cardstock and then painted a frame of rainbow watercolors onto a white cardstock background. I then layered flowers alternating between 5 colors/patterns, butterflies fussy cut from Paper 16, and hearts and button Chipboard Stickers.
I hope you are inspired to pick up the Blooming Wild collection and try out the Flower Frame and Layered Flower cut files! Have a fabulous day and see you next time!
SUPPLIES: Patterned papers, stickers, die cuts, embellishments: BLOOMING WILD; white cardstock; Cut files: Flower Frame and Layered Flower by Paige Evans

New Collection: Adventurous + Pre-Order Info


Friday, April 19, 2024

I am so excited to announce my 17th scrapbook collection with American Crafts called Adventurous!
This new signature line includes 48 products and is perfect for scrapbooking all your travels! Dive into a world of vibrant colors and captivating designs with bursting with bright florals that bring nature's beauty to life! Quilting-inspired patterns intertwine creativity & tradition and adorable houses exude charm and coziness! This collection invites you to document your cherished memories in a playful and heartwarming way.
(24) 12x12 Double-Sided Patterned Papers
6x8" Scrapbook Album
Scrapbook Album Refills (these will also fit my Sugarplum Wishes Album!!!) // 6x8 Paper Pad
Large Foam Alpha Thickers // Mini Foam Alpha Thickers
Floral Die Cuts // Ephemera Die Cuts
Charms // Washi Tape // Sequins & Trims
Cardstock Stickers // Puffy Phrase Stickers
12x12 Paper Pad // 12x12 Project Pad
Mini Puffy Stickers // Enamel Stickers // Chipboard Shapes

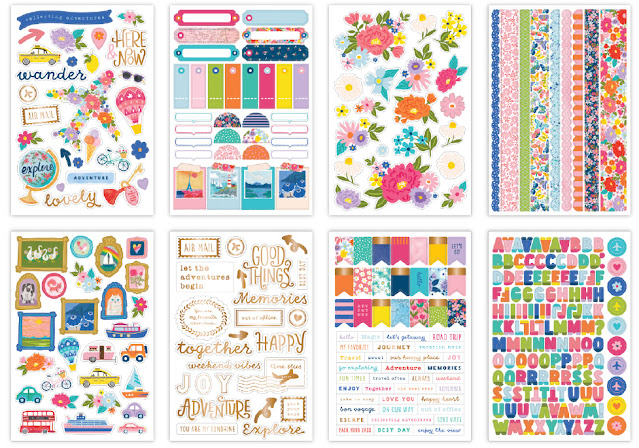
8-Page Sticker Book
Boxed Cards // Card Making Kit
Acrylic Stamps // Charm Staples // Rub Ons
12x12 Floral Transparency
PRE-ORDER INFO: The price for the entire Adventurous collection (48 products - everything shown in the photos) is $260 plus $12 shipping within the USA and can be purchased HERE. If you live internationally and would like a quote for shipping, please send me an email paigetaylorevans@gmail.com and let me know your address. The estimated arrival date is late June however based on past years some products trickle in late so I will hold the entire order until everything arrives.

I hope you love Adventurous as much as I do and you're excited to get it into your hands!
Let me know if you have any questions, thank you so much, and have a happy scrappy day!!

Growing Flowers Layout by Heidi Lewis


Thursday, April 18, 2024

Hi friends, it's Heidi Lewis back on the blog today sharing another layout! When Paige gave us the assignment to make something with flowers I took the idea quite literally and made a schematic of the process of growing a flower from a little seed. Splendid was the perfect collection to illustrate my schematic.
To start, I used a ruler to lightly draw a grid on a sheet of plain 12x12 paper. Each section measures 4x6 inches. Here is how I decorated each rectangle: I used Washi Tape to mark of the top left rectangle and ink blended the entire rectangle in yellow. I achieved a wet, splattered look by spraying the ink with water and pulling up some of the wet ink with a paper towel. I embellished the square with a Chipboard wreath and Epoxy Sticker title.
For the top middle square, I added a 4x6 photo embellished with a custom frame made from a border punch and Paper 10. A Chipboard flower was layered over the negative space in my photo.
In the top right rectangle, I added torn brown cardstock embellished with sequins for a more dirt-like texture. I used a raindrop punch to make the seed and two Floral Die Cut leaves to create a budding plant. An Epoxy "SMILE" banner sticker brings some color into the corner.
The bottom left rectangle features another Floral Die Cut growing out of the dirt. An arrow shows the plant is growing and a stamp illustrates that you need rain to grow.
Yes! The plant is continuing to make some progress demonstrated with an even bigger leaf from the Floral Die Cuts. Another ink blended background helps the middle section stand out from the sections on either side of it.
At last, the flower blossoms in the form of the April Flower Sweet Pea cut file, which I colored with alcohol markers.
This little schematic perfectly illustrates the saying, "April showers bring May flowers." P.S. How perfect is it that the photo shows my husband planting seeds for pea plants and I used a Sweet Pea cut file, lol?!

SUPPLIES: Patterned papers, die cuts, stickers: SPLENDID; Cut file: Sweet Pea by Paige Evans

Our Fun Fam Layout by Paige Evans


Wednesday, April 17, 2024

Here's the first of the four layouts we make in class with the Life of the Party collection by American Crafts!
Purchase the virtual class to join in the fun HERE!
This page features a checkerboard background made with a mix of square photos and patterned papers with added tone-on-tone hand stitching for texture & interest! Hand stitching is always optional, I just love the way it looks! The thread colors I used are listed in the class supplies so you can match them to the Life of the Party collection perfectly :) We learn how to make this page from start-to-finish along with 3 more 12x12 layouts. I walk you through my tips, tricks, and techniques and offer suggestions for changing things up and altering the page to put your own spin on it!
After purchasing the Life of the Party Virtual Layouts Class, Ecwid will email you the PDF that contains a list of supplies, photo sizes, templates, cut files, instructions, and a link to YouTube where the class takes place. The class is pre-recorded so you can go at your own pace, watch it as many times as you need, and access it at any time!
Let me know if you have any questions and I hope to see you in my Life of the Party Virtual Layouts Class!

Sparkle Layout by Danielle Miller


Hi friends! Danielle Miller here today sharing a new layout made with Paige's Blooming Wild collection and Folk Art Flower Group cut file!
I had so much fun creating this layout. I used Seedless Preserves, Salty Ocean, and Speckled Egg Distress Oxides to color the Folk Art Flowers. I love how well those colors go with the Blooming Wild collection. I created three clusters around the photo and they help draw your eye to the pic.
 I hope you are inspired to play with Paige's Blooming Wild collection and Folk Art Flower Group cut file!
SUPPLIES: Patterned papers, stickers, die cuts, embellishments: BLOOMING WILD; white cardstockDistress Oxides; Cut file: Folk Art Flower Group by Paige Evans

Deal Of The Week: 50% off Elastic Cording & Paper Beads Mini Album Virtual Class


Tuesday, April 16, 2024

Use coupon code SCRAPPY to receive 50% off my Elastic Cording & Paper Beads Mini Album Virtual Class from now until April 22nd!
TO USE THE CODE: Add the Elastic Cording & Paper Beads Mini Album Virtual Class to your bag, go to checkout, and find where it says "Have a promo coupon or gift card?" Click/tap "Redeem your code" and enter SCRAPPY to apply the 50% off discount - this makes the price $10 instead of $20. Code cannot be applied to past purchases and ends on 4.22.24.
CLASS DETAILS: In this 2 hour and 24 minute virtual class I teach you how to create an elastic cording mini album in my signature style from start-to-finish, complete with paper beads, custom tabs, and lots of color - all with my Splendid collection!
PLEASE NOTE: You are purchasing DIGITAL content, no physical items will be sent to you in the mail. After purchasing Ecwid will email you an email to download the PDF which has the link to the YouTube video where the class takes place at the top of the first page, a list of supplies to buy or gather from your stash, photo sizes, instructions, and templates to download/print/cut. For personal use only. All of my class videos are saved for re-watching at your convenience.
Let me know if you have any questions by email at paigetaylorevans@gmail.com, thank you so much, and happy scrapping!
Paige Taylor Evans © // Quinn Creatives DESIGN