Featured

Let's make a cute 3D Box Card

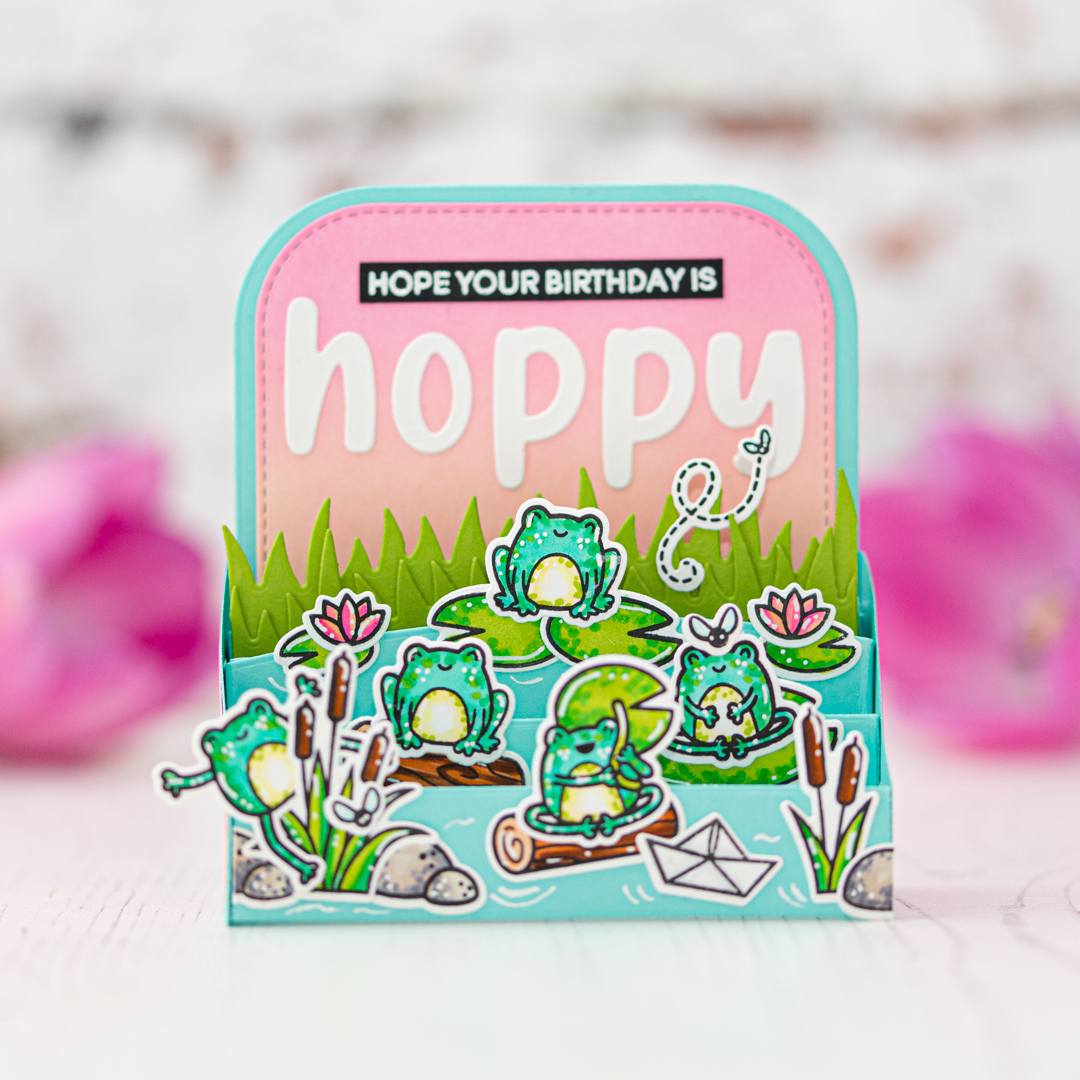
It's always exciting to try a new technique, or card type, so it was a joy to create this 3D card with the new Brooke 3D Box Card Die, what I made for the Heffy Doodle Insta Hop. (Hoppy hop 🐸😂) Come and join to hop along for the opportunity to win one of the gift cerfificates.


Disclaimer: This post contains affiliate links and I may earn a commission if you click them and make a purchase (at no additional cost to you).
If you got inspired please help me to spread the word by pinning this photo to your Pinterest. 

💖


STAMPING AND COLORING

I started the cardmaking process with stamping. I inked the cute frog images from the Be Hoppy Clear Photopolymer Stamps with Jet Black inkpad to Neenah Solar White Cardstock, then I gave them a little heat set with my heat gun, to fix the ink on the cardstock. After a heat set, I started the coloring process with Ohuhu markers.


POP-UP CARD BASE

When the coloring was done, I created the diecuts with the Brooke 3D Box Card Die from Mermaid cardstock. I also made a few die-cuts with the Freshly Cut Grass Dies with Cilantro cardstock. Next, I created some stitched Die-cuts from Neenah Solar White Cardstock and made on it a quick inkblending with Kitsch Flamingo and Tattered Rose Distress Oxide Inks. That's what you see in the background and on the sides of the card.


SENTIMENT

Before I put the colored critters to my box, I created the sentiment to the background. I created the "HOPPY" text with the new Moxie Alphabet Dies and I also stamped the sentiment from the Be Hoppy Clear Photopolymer Stamps with watermark ink. After this I heat embossed it with white fine embossing powder on a black cardstock.


WRAP UP

Last but not the least, the colored images found their place. Thank you so much for stopping by, don't forget to join the IG hop fun by April 27, 2023 at 11:59 PM EDT


USED SUPPLIES

Affiliate links were used where possible. I may earn a commission if you click them and make a purchase (at no additional cost to you). I am using only products I LOVE. If you buy supplies through my affiliate links, you support my channel and blog with a small commission and when you shop through my links I will do a happy dance. Affiliate Disclaimer.

Lovely pop-up box card inspiration [VIDEO]

One of my favorite type of cards is the pop-up box card! So, Let’s make one together! 😊 I have a new Lawn Fawn video tutorial for you on my YouTube Channel


Disclaimer: This post contains affiliate links and I may earn a commission if you click them and make a purchase (at no additional cost to you).


THIS CARD FEATURES

For the additional supplies with shop links visit the thumbnails below this post.

If you got inspired please help me to spread the word by pinning this photo to your Pinterest. 

💖


VIDEO TUTORIAL

In my video tutorial I’m gonna teach you, how to make and fill a pop-up box card easily. The coloring process is included with Ohuhu Markers as well.


STAMPING AND COLORING

I just love cute images! Of course, I started with stamping! So, I inked the above mentioned lovely images with Jet Black inkpad to Neenah Solar White Cardstock, then I gave them a little heat set with my heat gun, to fix the ink on the cardstock. After a heat set, I started the coloring process with Ohuhu markers. I recorded the coloring process as well which can find in the video above.

POP-UP CARD BASE

When the coloring was done, I created 2 diecuts with the scalloped box card pop-up die from Mermaid cardstock. I also made a few die-cuts with the grass die from the shadow box card park add-on dies with cilantro cardstock. Then I run 3 grass die-cuts through my diecut machine with the scalloped box card pop-up die to get this scalloped ending on the bottom. Next, I created stitched rectangles with the scalloped box card pop-up die from this lovely cardstock from the What’s sewing on petite paper pack


I also created a banner with the fancy wavy banners die from Ballet Slippers cardstock.When the die-cutting was done, I did a quick ink blending on the grass die-cuts with peacock feathers distress oxide ink. I have used this color because I wanted to give a color shift to the grass. Then I put together the base with strong double sided adhesive. Next, I dressed the box with the grass edges. I just adhered them with liquid adhesive to their right place. 


SENTIMENT

Before I adhered the colored images to the box card, I stamped the sentiment to the banner with watermark ink. After this I heat embossed it with white fine embossing powder. I fold it with my teflon bone folder, and adhered it to the front of my card. 


WRAP UP

Last but not the least, I put the colored images to their place. For the standing elephants I created one more die-cut. Adhered them together with liquid adhesive, and placed it to the grass like a clip. It will hold better and won’t bend the cardstock when it will dry. In the tutorial you can see this process as well.


USED SUPPLIES

Affiliate links were used where possible. I may earn a commission if you click them and make a purchase (at no additional cost to you). I am using only products I LOVE. If you buy supplies through my affiliate links, you support my channel and blog with a small commission and when you shop through my links I will do a happy dance. Affiliate Disclaimer.

Color Combo Ideas + Free Printables

Many times during the cardmaking process I find a new (to me) super cool color combo that I like, and because of the lack of time, I just mark it somewhere to a piece of cardstock. Next time, when I need it again of course I can’t find it and I am going with the same used color. Can you relate? 😅


Disclaimer: This post contains affiliate links and I may earn a commission if you click them and make a purchase (at no additional cost to you).

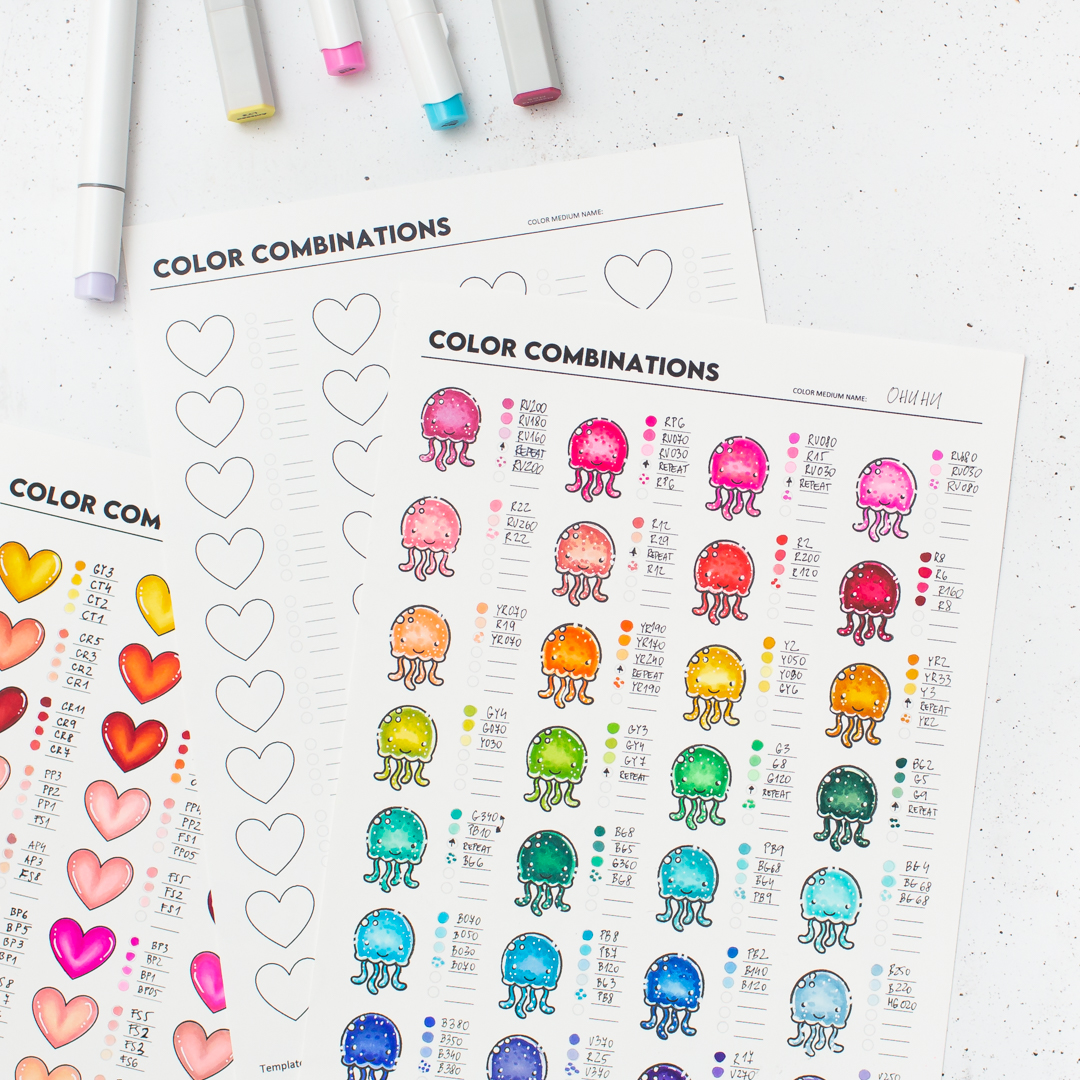
Anyway, this is the reason why I made this color combo chart. To have it close to my desk, and when I need it, I am swatching the markers to those teeny-tiny circles to have marked done and when I have more time, I finish it with a little sample coloring to see how it looks, when those colors are used together. This really works for me and I thought you might find it useful as well. 


Color Combinations


I thought it might be inspirational for you to see my color combos, and maybe you can save a few to your swatchbook. I will add more soon to this post, feel free to bookmark it and come back later.

Click on the image if you want to enlarge it

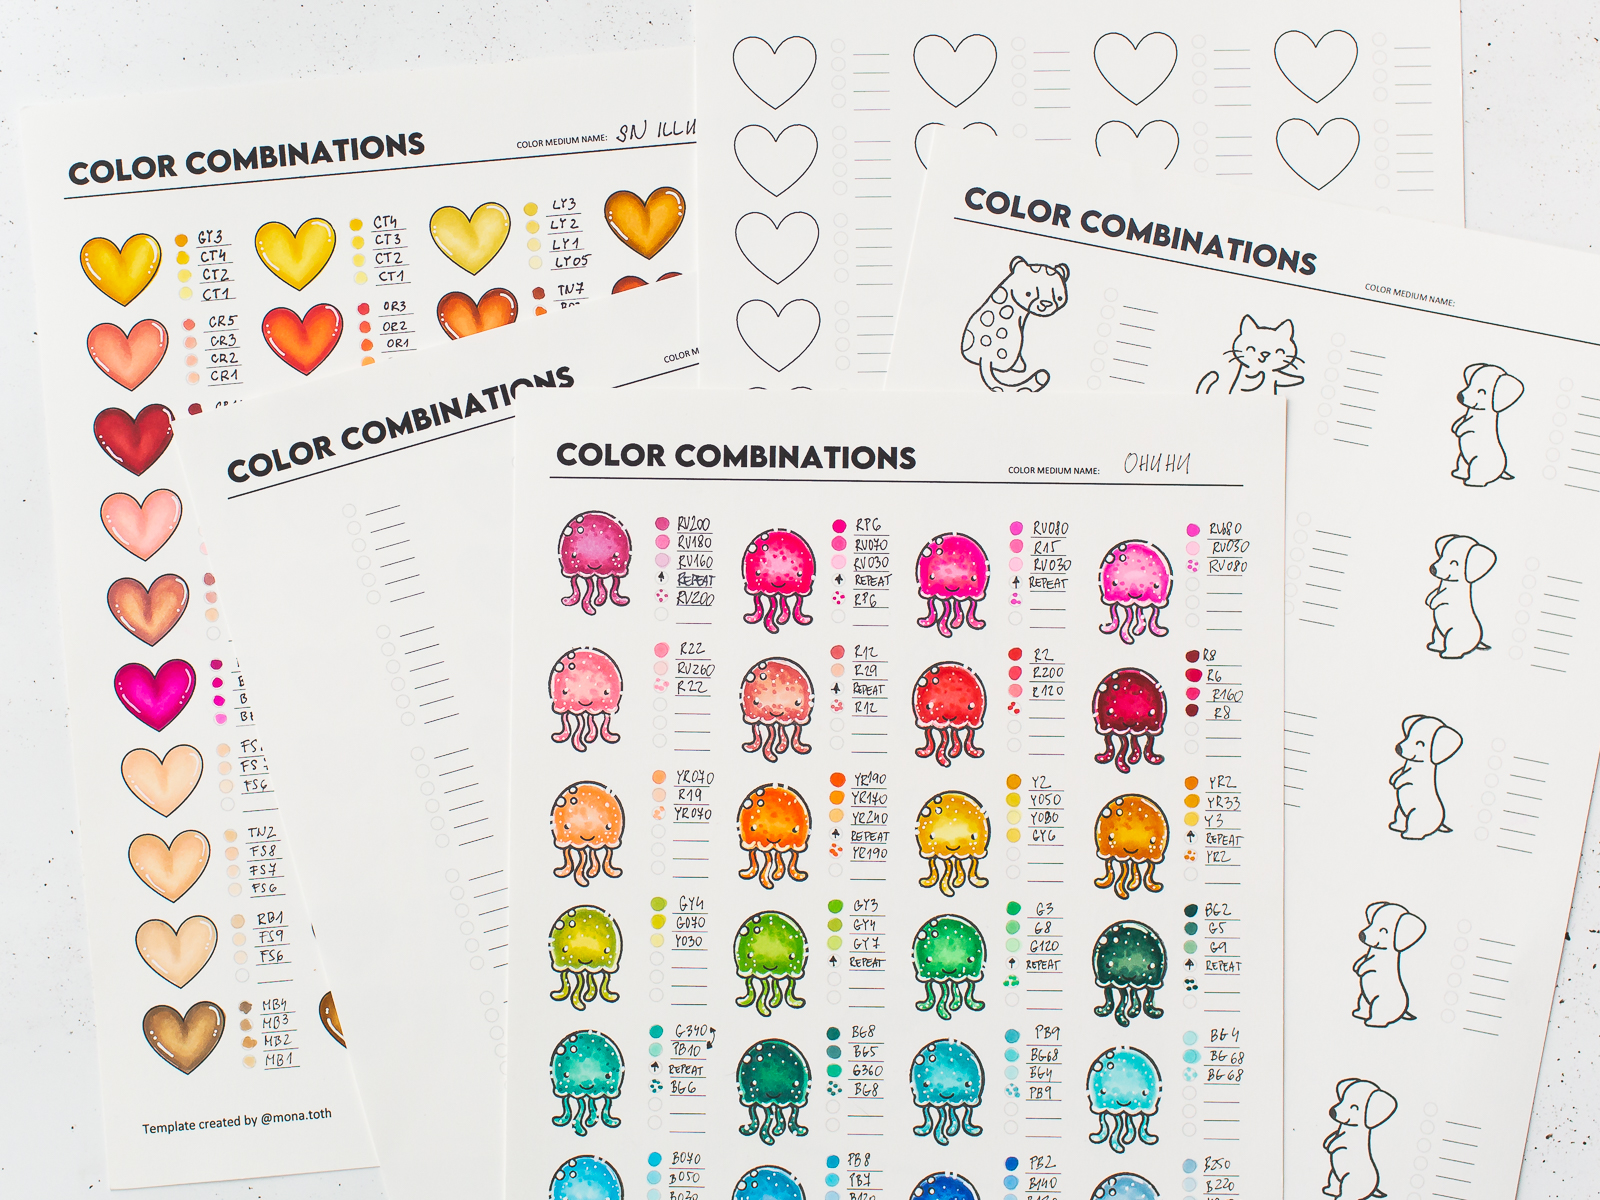
On the Image above I have swatched my Ohuhu markers. I have the 219 set from the Honolulu Series, so I am pretty sure I will make more swatches in the future, I just need to find a bit of time for it. I have printed the Small Spacing Chart, because the So Jelly stamp set is smaller and a good fit. I have used the Jet Black Inkpad for stamping.

Click on the image if you want to enlarge it

I have a few Spectrum Noir Triblend Markers, so I swatched them quickly as well. I printed the heart shaped aka “pre stamped” swatch chart, so I saves a lot of time with the stamping.
 
Click on the image if you want to enlarge it

Here I did the same process, but this time for Spectrum Noir Illustrators. This is just a warms sheet, probably I will make a cool version as well in the near future.

More information and tips with the swatch cards


  • There are two sizes, A4 International and US Letter, so you can print the version which you prefer more.
  • As I already wrote, there are two types of the printables. One heart shaped aka “pre stamped” so it’s ready to use and two empty ones for stamping with the wished stamp set. One version is for the smaller stamp sets like the So Jelly mini set I have used for color swatching, and one for bigger images like these super sweet Lawn Fawn critters.
  • If you want to swatch your alcohol markers, like CopicsOhuhuSpectrum Noir or others, then I suggest you to print the PDF with inkjet printer to a Neenah Solar White Cardstock or any alcohol marker friendly cardstock you prefer.


  • If you want to swatch your water-based markers and color mediums like Tombow MarkersKarin Markers or Watercolors, then print the PDF with laser printer, to your favorite watercolor paper.
  • If you print the empty one, I suggest you to check which size is the better for your wished stamp set. (Yes, the L size was born because I started the stamping with a bit bigger stamp. 😅) I suggest you the Jet Black inkpad for stamping by Lawn Fawn, and before coloring make sure to give a heat set with heat gun to the entire surface before you start the coloring process. This will prevent the ink smearing from the outlines.
  • You can use it for color combo swatching but you can create your own combos by the type of critters as well. For example, cats or dogs in different colors and many others as well. It can speeds up your coloring process in the future and you can find new favorite combos as well.


  • If you are in a rush, just color the small dots on the cardstcok and you will finish the sample coloring later you have time.
  • You can also find some coloring guides on my Instagram too. I collected the posts here.

Freebie


If you like these printables then I have good news for you! It’s free for my newsletter subscribers. Check out my freebies here.


Used Supplies

Using affiliate links does not mean additional costs for you. I really appreciate your support. I am using only products I LOVE. If you buy supplies through my affiliate links, you support my channel and blog with a small commission and when you shop through my links I will do a happy dance. Affiliate Disclaimer.